Create a new mail profile for all Outlook versions using Office 365
Posted on 17 April 2018 by Beaming SupportThis is a short guide on how to create a new mail profile on all Outlook versions for Windows
A number of problems with Outlook can generally be fixed by creating a new mail profile, for example if emails are no longer synchronising with Outlook, or you simply cannot send emails from Outlook. It’s also helpful if you have multiple email addresses that use Outlook.
Step 1
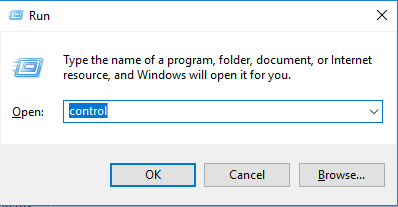
To get started and create a new mail profile, firstly you will have to open up your control panel on your computer, this can be done by pressing CTRL+R on your keyboard and typing in “control” in the box (as shown below)
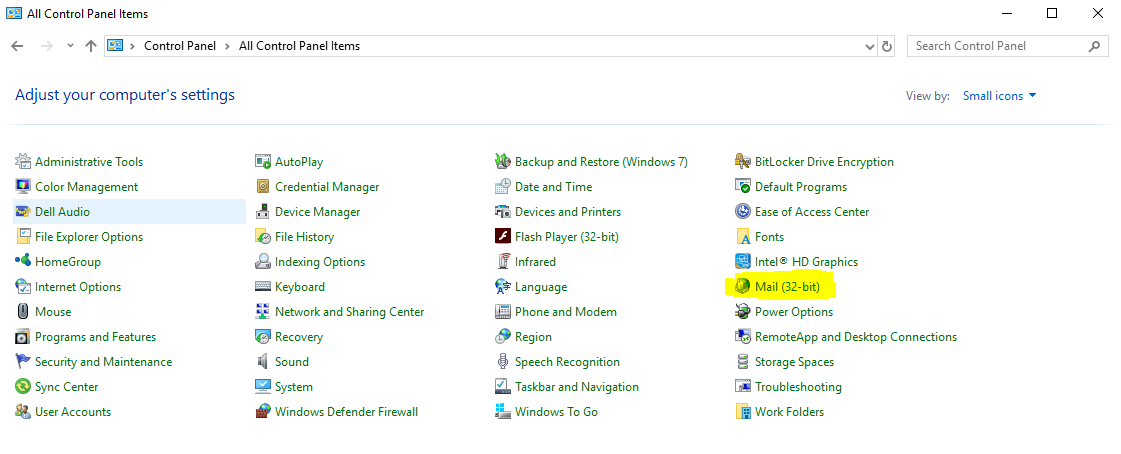
This will take you directly to the control panel view. In the top right hand corner of the new screen there will be a “View By” option, to make the next step easier please change this option to “Small Icons”.
Step 2
Once the above step is performed you will have a view of all of the control panel items. Look for the “Mail (32-bit)” icon, which is highlighted below.
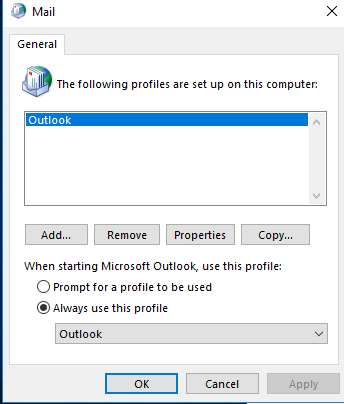
Double click this and it will present you with a new box (as long as you have Outlook installed). Click the “Show Profiles” button, which will allow you to see all of your current Outlook profiles, there may only be one if this is the first time you are configuring a new profile. You will then be presented with the below box.
Step 3
To proceed with the creation of a new profile please click the “Add…” button, this will then prompt you to create a name for your new profile. The new profile will be stored in the same menu that is displayed above, and can be called “New” as an example. Once a name has been entered a box will come up, asking for your email address and password which is displayed as per the below.

Once you’ve entered these details please proceed. This will configure your new profile automatically. You may need to set this as the default profile which can easily be done by revisiting step 2 and then changing the “Always use this profile” drop down box to match your new profile name.
Now that the profile has been configured it may take a while for your mailbox to update but this has now set you up with a new profile.
Quick Recap
Here’s a brief recap of the above steps. The arrows indicate the next step to take.
CTRL + R -> “Control” -> Double check view is set to small icons -> Click “Mail (32-bit)” -> Show Profiles -> Add -> Enter name you would like -> Enter email credentials -> Click Next and wait for it to authenticate -> Press Finish and wait for mailbox to sync.
Our support archive contains how-to guides on a range of subjects including email, information security and connectivity.