Windows 7 and Windows 8/8.1 End of life support
Posted on 31 January 2023 by Beaming SupportIn a not-unexpected move (the date has been known for several years), Monday the 10th of January 2023 saw Microsoft withdraw support for both Windows 7 and Windows 8/8.1.
Going forward this means there will be no more updates and, more worryingly, no more security patches. This means your operating system (and thus your data) becomes much more vulnerable to being compromised.
So, what should you do with any computers you have that are still running these operating systems? There are still a surprising number of them out there – in December 2022 Microsoft found that over 11% of Windows PC’s worldwide are still running Windows 7. Windows 8/8.1 is much less popular with just 3.2%, but this still gives us almost 15% of all Windows PC’s running an out-of-support operating system.
Windows 7 was first launched on the 22nd of October 2009, making it over 13 years old, and Windows 8 is not a lot newer at over 10 years old. This of course means that any machine still running Windows 7 is probably at least 10 years old, and Windows 8 at least 7 years old, therefore the specification by modern standards is probably quite poor. However, if you are determined to keep using your PC, there are ways to upgrade it to Windows 10 (Windows 11, due to its high minimum specifications and requirements to have TPM 2.0, is probably a step too far).
Below is a guide to upgrading, but be warned – it’s not a simple process, nor is it 100% reliable, so make sure all your data is backed up before trying this.
You will need a USB memory stick with at least 8Gb of space, and need to know your Windows 7 / 8 product key.
Step 1
Make sure your current install of Windows (be it 7 or 8) is fully licenced, and that you have the product key.
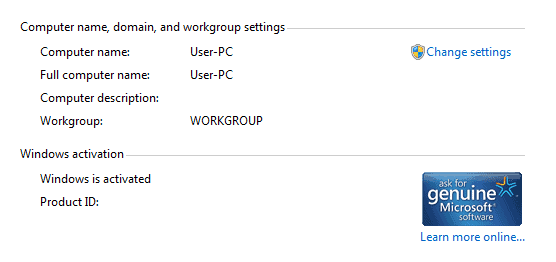
To check the licence status, open Control Panel, click on System and Security and then on System.
Scroll to the bottom of this windows and you will see the windows activation section. If you see ‘Windows is activated’ as in the diagram below you are good to proceed. Remember you will almost certainly still need the actual product key, which should be on a sticker on the outside of your PC.
Step 2
Create Windows 10 Installation Media
Make sure the USB memory stock is inserted in a free USB slot on your computer. This process will delete any data on the stick so
make sure you don’t have anything on it that you need.
The link below takes you to the Microsoft Windows 10 Media creation page.
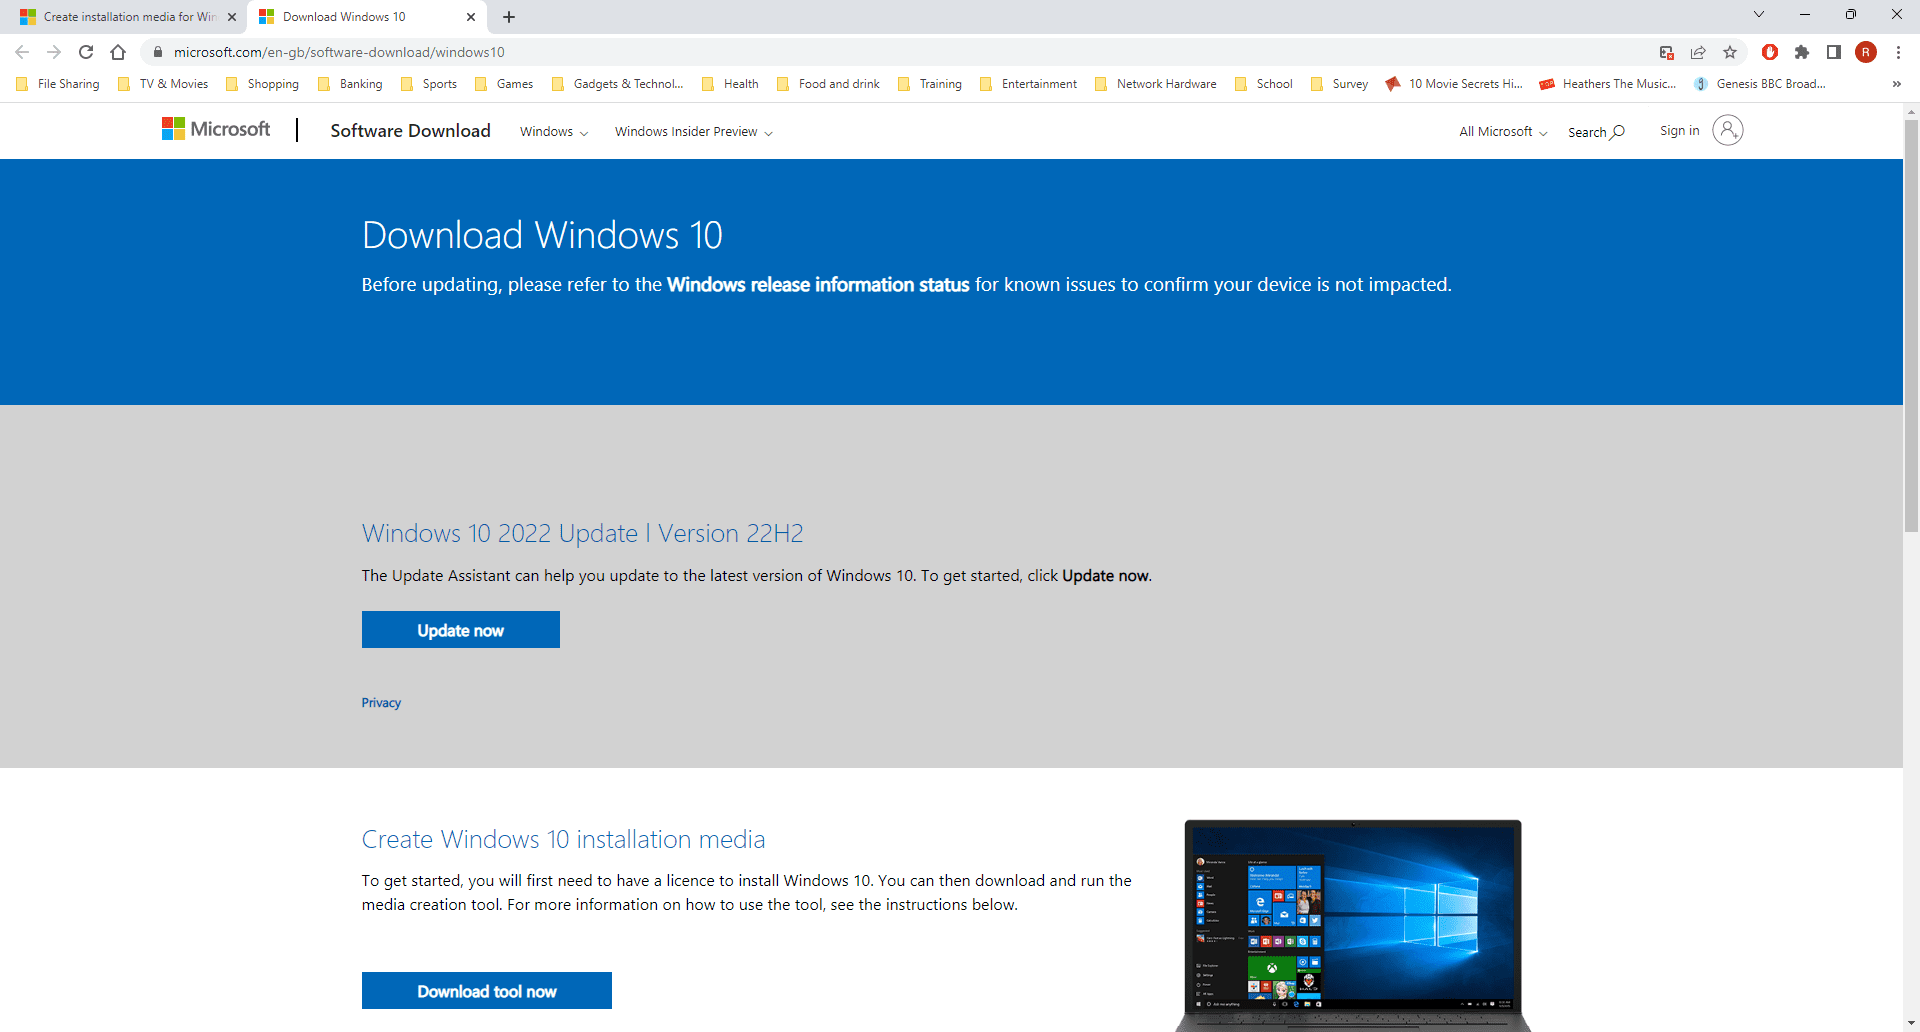
Click on the ‘Download Tool Now’ button and run the program that it downloads.
Now this is where the first problem could occur – the media creation tool does not always work with Windows 7. If you get the following error: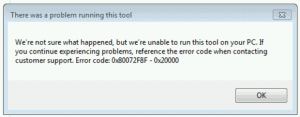
Then you will have to do this part of the process on another PC.
But if it works, or you run it on another PC, you will be presented with the following screen:
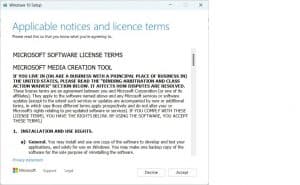
Click ‘Accept’ and wait.

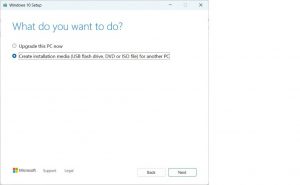
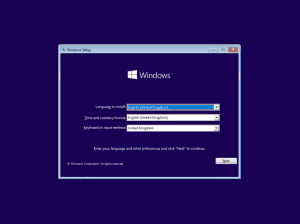
No matter if you are running on the PC you want to upgrade or on another PC, select ‘Create installation media’ and click ‘Next’.
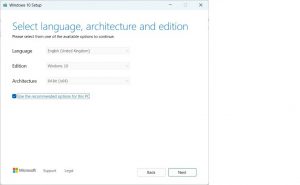
Leave this screen alone with the default options and click ‘Next’.
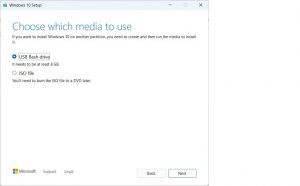
Leave this with the USB flash drive option selected and click ‘Next’.
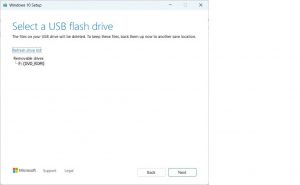
Select the USB memory stick you want to use from the list and click ‘Next’.
Wait for the files to be downloaded.

Wait for the media to be created.

Step 3
Install Windows 10
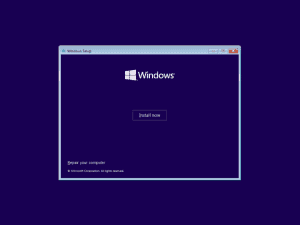
Once you have your Windows 10 installation media you will need to boot the PC you want to upgrade using it.
When you have booted to the USB stick you will get this screen.
Click ‘Next’.
Click ‘Install Now’.
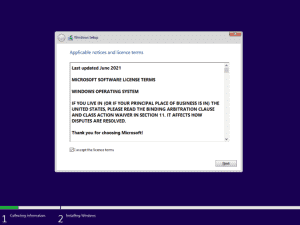
Tick the ‘I accept the licence terms’ box, and click ‘Next’.
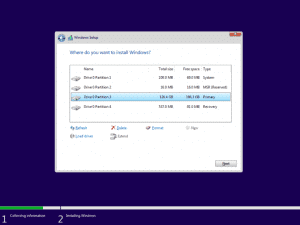
Click on the ‘Custom’ option.
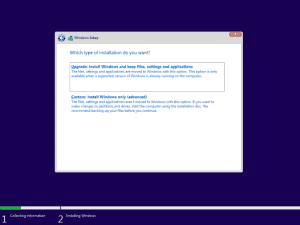
Select the Drive partition that already has Windows 7 installed on it (this will probably be the partition with the largest total size).
Click ‘Next’.
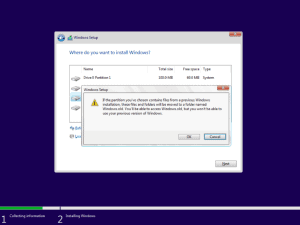
If you have selected the correct partition, you will get the below message. Click ‘OK’
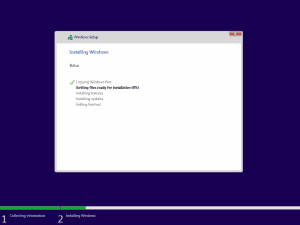
Windows will then install and take you through the initial setup process.
Step 4
Activate your new Windows 10 installation
Once you get to the windows desktop you will need to make sure your new version of windows is activated properly.
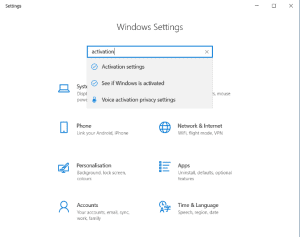
Click on the start button and then click on the cog icon to open the settings.
In the search box at the top type ‘activation’ and click on ‘Activation settings’.
From here you will see if Windows is activated – if it is, great! Your upgrade has worked.
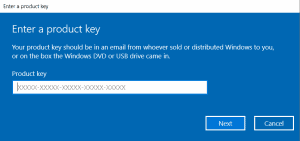
If not, click on the ‘Change product key’ button and enter your Windows 7 product key from the sticker on the side of your PC.
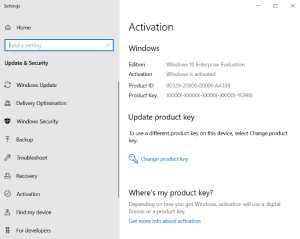
This should then activate and work.
All your old files from the Windows 7 install will then be in the windows.old directory on the C drive of your PC.
Open file explorer and navigate to C:\Windows.old\Users\xxx\
(Where xxx is your old Windows 7 Username)
Here you will see all of your document, photo, music etc folders.
Highlight them all and move them to c:\Users\yyy
(Where yyy is your new Windows 10 Username).