How to add and remove RDS collections in Windows Server 2016
Posted on 19 August 2019 by Beaming SupportHaving RDS collections can be very useful if you have a situation where you are an administrator for a terminal server and need to “Shadow” users sessions or send them messages. This also helps to manage the access to the terminal servers.
Step 1
Go to the server that you would like to access the collection from and open Server Manager.
Step 2
Once server manager has opened up, you will need to go to your “Remote Desktop Services” tab. Once you are there, please ensure that the servers that you require to be in your collection are listed in the “Servers” list. If not, please add them accordingly.
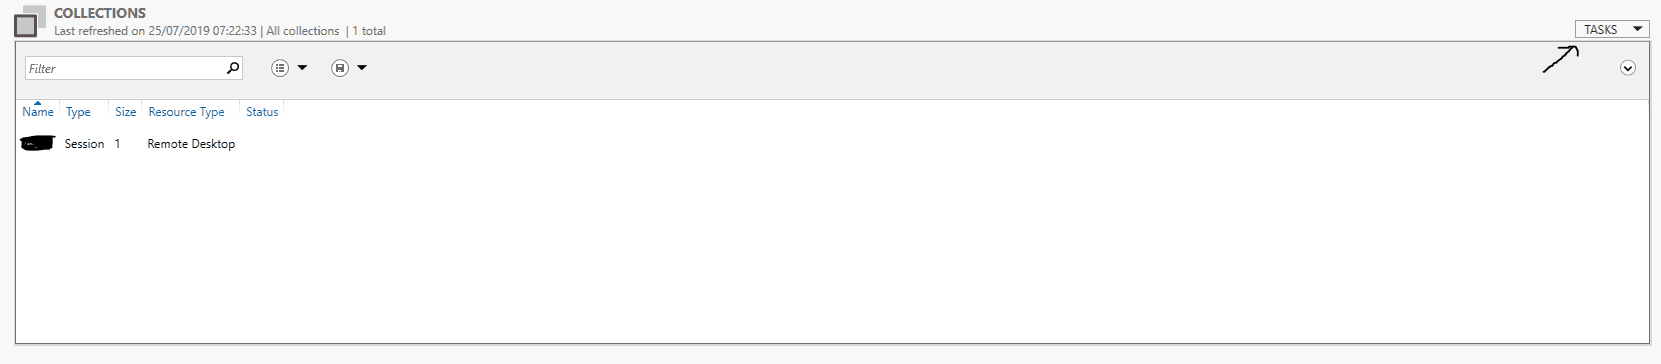
Step 3
Then go to the “Collections” tab, and go to the top area and click on “Tasks” as per the below screenshot.
Step 4
You will then need to go to the option of “Create Session Collection”, once there it will present you with the following wizard.
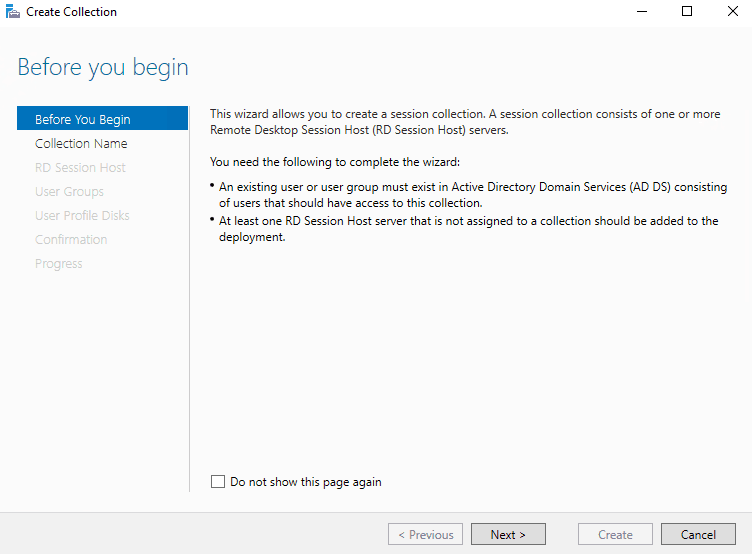
The first step in the wizard will be to press next after you have read the information. You will then need to create a suitable name for the collection and (optional) description and press “Next”.
Step 5
The next step is to select the relevant servers from the server pool listed that you would like to become a part of the collection. For example, you may have multiple Terminal Servers which you may want to load balance between, this is where you would add them. Once you have added the servers, please press next.
Step 6
On this screen, you will be asked to select the user groups which will be granted access to log into servers within the collection. If all domain users are required to have access then you can add the group “Domain Users” to this list. On the next screen, you will be asked if you wish to set up User Profile Disks. This particular section is completely up to the admin who has set up the domain, if they have already set up redirected folders then there is no need to use User Profile Disks. Generally, this option is left unticked and folder redirection is used but if the admin wishes to use User Profile Disks, this would be the moment to enable them.
Step 7
The next screen will then confirm all of the settings that you have selected and ask you to confirm you are happy to proceed. Once you are happy, please proceed with the setup and it will complete.
You will now see the collection listed under the “Collections” tab in Server Manager.
Removing Collections
If you wish to remove a collection for any reason, the process is quite simple. All you have to do is go to the collections tab, in the top area of the tab you should then see the collection/collections that you have put in place, you simply need to right click on the collection you want to remove and click “remove collection”. It may ask you to confirm if you are sure you want to remove it, but once you proceed the collection will be removed.